It’s a bliss to go camping in perfect weather, as one gets to enjoy the sunshine during the day and the starry sky in the night. However, it’s not always easy to avoid the rain on the west coast. We live in a temperate rain forest, after all. As we often book a camping trip well in advance, it’s a crapshoot what kind of weather we get. Do we cancel when the forecast looks rainy? No! We would cancel half of our trips if we did that.
Instead, we learned to embrace the rain on our camping trips. I actually enjoy the process of planning, implementing, stress testing, and evolving our rain tarp setups.
Ridge Line with Taut Line Hitch
Early on in our camping journey, I watched lots of videos about building a shelter and got a big 20 x 16 feet tarp. I also watched a bunch of videos about starting a fire in the rain.
Most videos showed how to build a small survival shelter for 1-2 people, or perhaps cover a small tent. I soon found out that it’s much harder to build a large enough shelter to cover the cooking and activity areas, which are essential to keep dry for a successful trip.
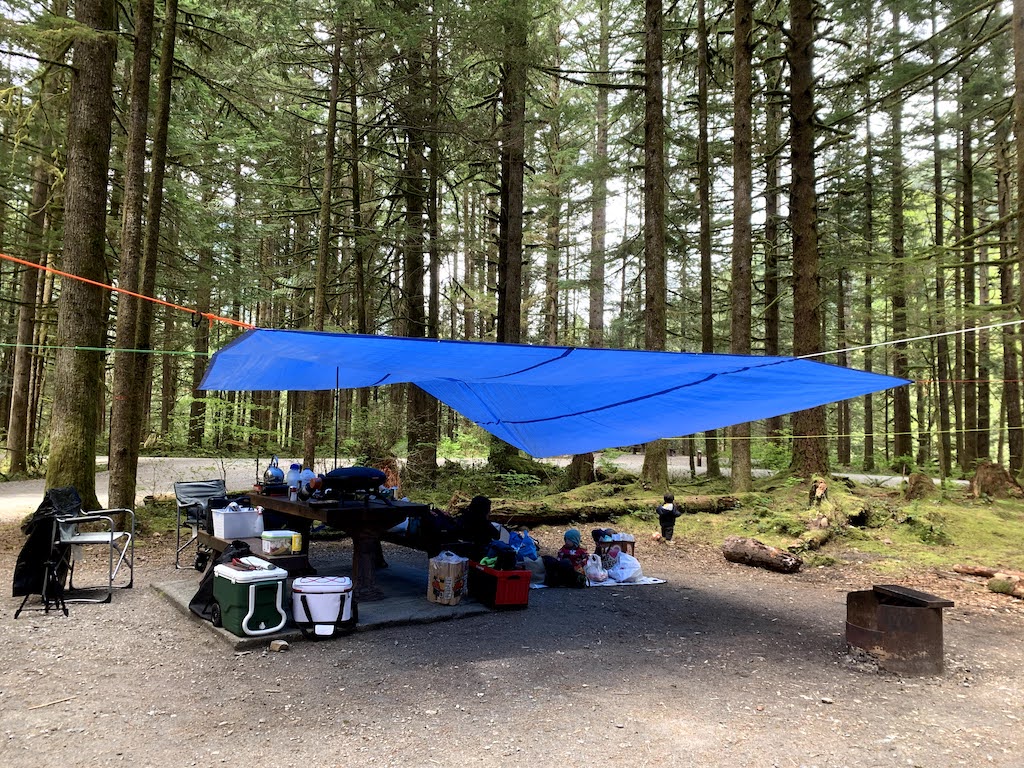
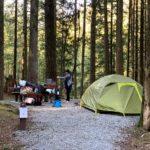
During a rainy trip to Golden Ears in 2020, early on in our family camping career, I opted for the ridge-line method using a taut line hitch, with a hiking pole as a tent pole in the centre. Tying the ridge line high enough for a 20 feet tarp was not an easy task, so I had to improvise.


We then tied down the sides from 6 points, raising the corners high enough so that it isn’t too close to our cooking area. Also I wanted to make sure that when I walked around our campsite I wouldn’t be walking into the ropes. The whole set up probably took over an hour, and boy, was I glad the rain hasn’t arrived yet.


When we finished, the big tarp looked quite impressive. Little did we know, we were in for some good lessons about shelter building…
The rain started to arrive in the afternoon. We went on a rainy walk but it got too wet so we turned back about half way up.


By the time we got back, puddles have formed around the tarp. The brothers went to investigate


It got progressively wetter and darker, until it became a torrential downpour.


I tried to get a fire going but we intentionally positioned the tarp a few feet away from the fire ring because we thought the flame or spark may damage the tarp, so the fire was put out almost immediately. (After this trip I looked up a few videos that showed it was in fact quite ok to put a tarp over a fire to protect it as long as 1. it’s raining, which will keep the tarp cool enough to not burn, 2. we keep the tarp high enough away from the flames, and 3. we slant the tarp such that the hot air can escape.)

Because our large tarp was set up fairly flat with the corners pulled too high, and our ridge line was starting to sag, water started pooling on the sides. It was too late to redo the tarp since the rain had gone full force, and we are also trying to cook dinner at the same time. The tarp started to warp and cave in under the weight of the pooling water. We did what we could to adjust the guy lines on the corners to give it more slope for better drainage, but several spots continued to pool water. Comically, these areas would buckle and empty all at once at regular intervals like the water park dumping buckets. At one time, a dump of water even washed a camping chair away.


Remarkably, the tarp itself held up very well. As long as we stayed under the tarp and away from the edges, it did a great job keeping everything in the centre dry.
The rain finally let up after an hour or two. With dryer lint mixed with Vaseline as fire starters and using the log cabin build and a protective log covering the burning core, we actually managed to get a fire going in the rain.
We turned in for the night pretty quickly afterwards. The weather was not conducive for a fireside chat that night.


The rain continued into the next morning, and everything was still wet. I wonder how a backpacker can ever get their gears dried up if they hit a prolonged rainy spell. They probably have to hunker down until the rain passes. Hiking in wet shoes and socks wearing wet clothes and gears is not just uncomfortable, it can be dangerous.


We took from this trip a few more lessons about building rain shelters for the campsite. I learned about the trucker’s hitch which is much stronger than a taut line hitch for the ridge line, which can hopefully reduce the sag. I will lower the sides of the tarp so that a clear drainage slope can be created to avoid pooling water. We would have to sacrifice some head room, but in exchange we hopefully won’t have a sagging tarp with gallons of pooling water again.
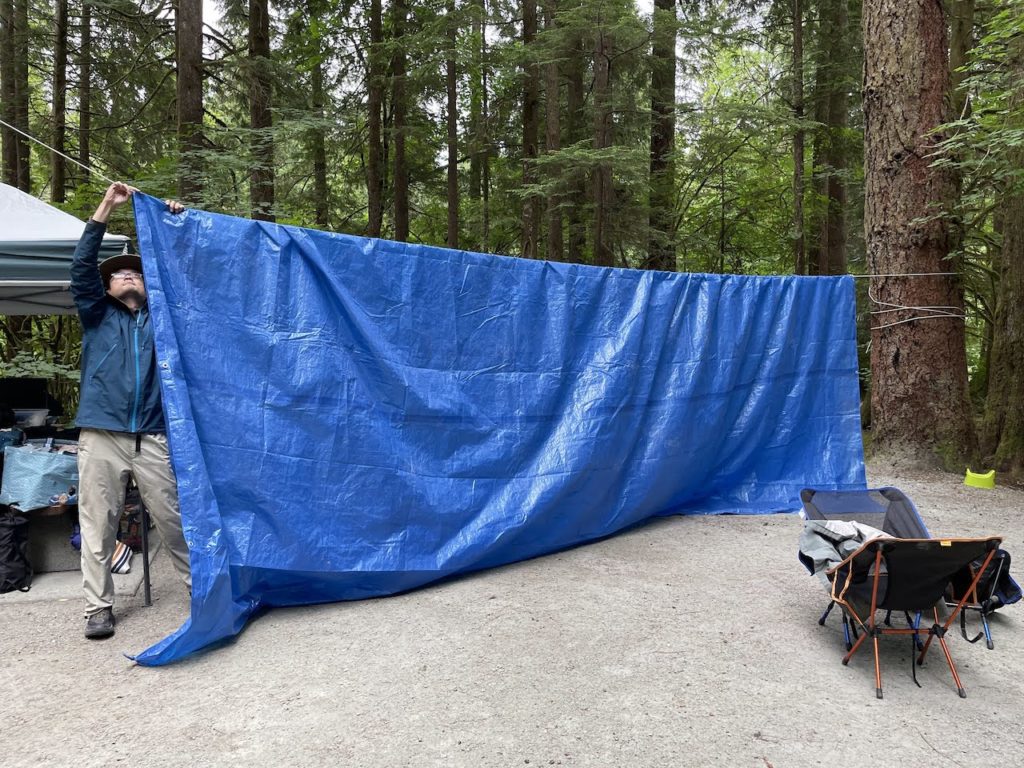
Substantially lower the sides and create a clear drainage point
We had a chance to update our tarp design on a trip to Porpoise Bay. I tied the ridge line to a tree trunk as far as I can reach, and I used the trucker’s hitch to create as much tension in the line as I can.


The main problem with having a trucker’s hitch is the need to tie off the hitch. It limits the maximum height for the ridge line, as it must be reachable by hand to be tied off. No matter how much tension is put in the line, with a wet 20×16 foot tarp, it’s going to sag a little bit. So what’s reachable height near the tree trunks become touching-your-head height at the center. As a result, a stick is needed to raise the tarp to create headroom.

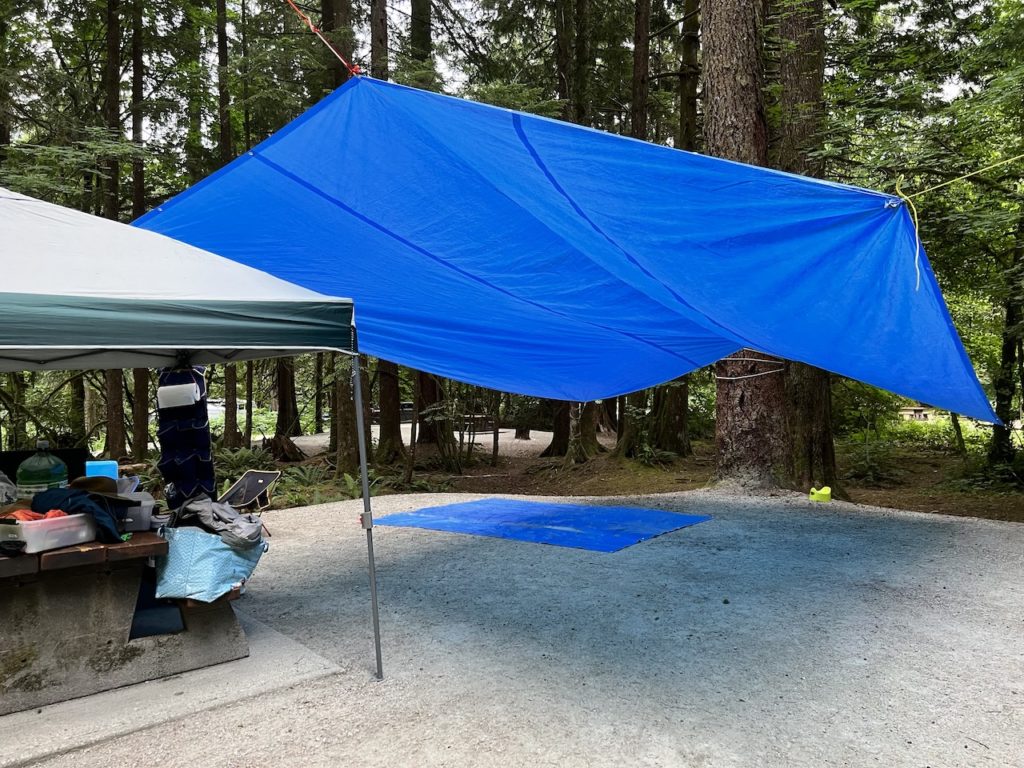
Because the two corners are at a similar height, and my tent was pitched down slope from the main tarp, we used a guy-line at the center of the edge to pull it down with a ground stake and create a drainage point away from my tent.

The result: no more pulling of water and the tarp would continuously drain from the center. A big improvement!
However, the water would still flow down slope towards our activity area and tent, so we dug a little ditch to let it drain out. We did put the gravel back the way it was before we checked out.

Lessons:
- do not put your tent down slope from the tarp. At least pitch it away from the drainage point by a foot or so.
- Trucker’s hitch is better than taut line hitch, but it still makes a ridge line that’s still too low for a large tarp like this.

The as-high-as-you-can-get Method
When we camped at Cultus Lake, the forecast called for rain again. Perfect opportunity to try my hands on setting up the big tarp again. This was my best tarp setup yet!
I was able to find two strong trees to set up the ridge line. This time, instead of a proper tie-down like a taut line hitch or trucker’s hitch, I just tied the rope to a bag with some rocks and threw it over the highest sturdy branch I could reach. On the other side, I pushed the rope up the trunk with a stick to a similarly high point. Then I simply tied the rope to the tree trunk a chest height.

As a result, although I couldn’t apply and maintain as much tension to the rope as I could with a trucker’s hitch, I was able to get the ridge line much higher (probably more than 10 feet off the ground). Even with the tarp draped over the rope and dragging it down by a few inches, the center of the ridge line was too high for me to even reach. I threw another line to pull it down enough so I could tie a prusick knot to anchor the tarp on the ridge line.
With the ridge line 8 to 9 feet off the ground, I could tie the 2 higher corners fairly high up as well, creating ample headroom for everyone. The tarp is naturally slanted downhill, and I tied the two lower corners to low anchors. The result is 2 beautiful drainage points downhill and away from our tents and activity areas.


With this set up, I didn’t need to use any supporting sticks, and I had lots of head room.
Finding the right trees for the ridge line was key to this set up. They have to be just the right distance apart and it’s best if they have branches around 10-12 feet high.
In our trip, I had trouble choosing 2 trees that are strong enough and close enough to set up the tarp over the picnic table. Thankfully, we had a cooking tent so we didn’t have to cook in the rain. If I had a 100 feet rope, I would have more trees as options to choose from.
Reinforced our set up
We had another rainy camping trip and we did the high-as-you-can-get method again at Lightning Lake in Manning Park. This time, we were also able to cover the fire pit with our tarp. We made sure we slanted the tarp up and away from the main activity area.

We weren’t able to cover the picnic table, but since we had the luxury of a cooking tent, we just set up our eating area in the tent instead. It has the added bonus of mosquito net to keep the bugs out.

The ridge line was thrown way up high because one of the trees had no branches until 15 feet up, which used up quite a bit of rope so we tied two ropes together to form the ridge line.
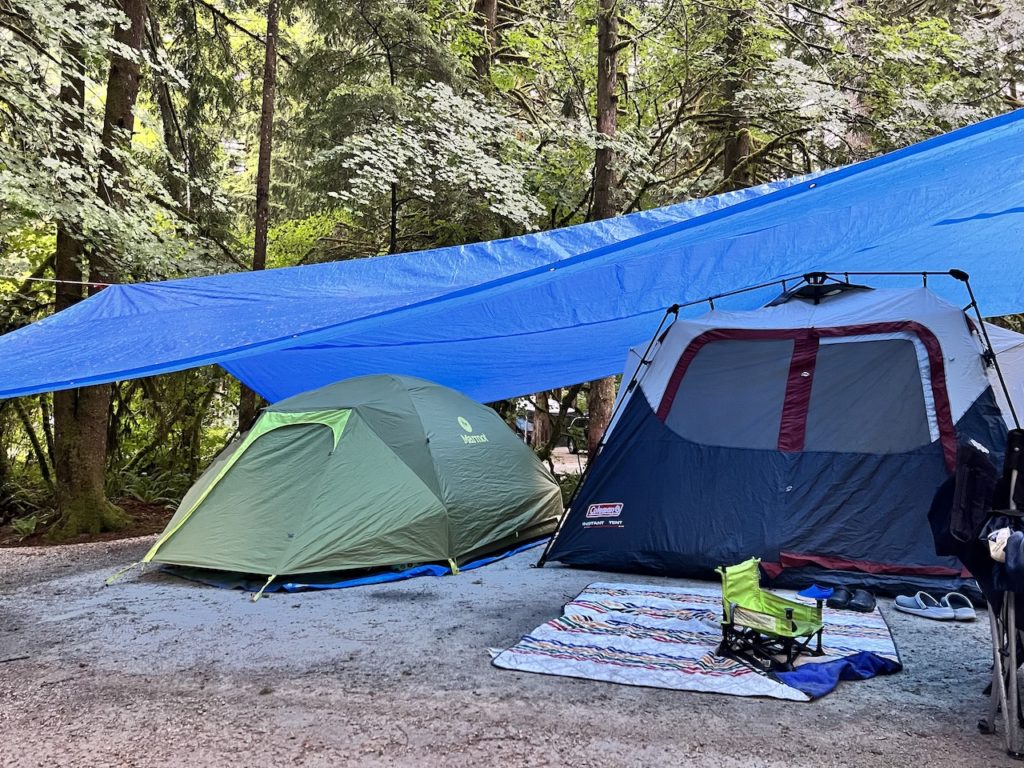
We pitched both tents such that the front door was below our rain tarp, so we were covered getting in and out of the tents. It would have been even better if the tarp covered the front half of the tent, so that rain won’t drip down to the front.
One of the drainage points on the lower corners were a little close to the blue tent so there was a bit of back splash. A bucket solved the problem.


We easily made a fire under the tarp without any worry about damaging the it. However, the smoke and ashes collected under the tarp and lingered over our tents and activity area, which was pretty unpleasant.
Since smoky fires are hard to avoid when burning damp wood, I think I would have to change the set up yet again. I would probably try to use a dedicated small tarp for the fire, and separate it a few feet from the big tarp that covers our tents and activity area. Hopefully with a wide enough gap between the two tarps the smoke would have somewhere to escape.
Adding Tarp Poles
For our trip back to Golden Ears, we added a pair of tarp poles to our camping arsenal to compliment our rain tarp system. They are great for fine tuning the height of a particular area and changing the slope and shape of the tarp, especially when anchor points are limited.

We have been lucky that during most of our rainy trips, we went with camping buddies who had a canopy tent for the cooking area. There’s no way for us to add a canopy tent due to our maxed out cargo space, so we went by ourselves, we would have to use the tarp to cover the picnic table. The tarp poles can give us much more flexibility and reduce our dependence on perfect tree placements when choosing a location for the tarp.
Discover more from Outdoor Family
Subscribe to get the latest posts sent to your email.

Pingback: Camping at Cultus Lake Provincial Park – Outdoor Family
Pingback: Camping at Porpoise Bay Provincial Park – Outdoor Family
Pingback: Lightning Lake Camping at Manning Park – Outdoor Family
Pingback: Lower Gold Creek Falls Hike – Outdoor Family
Pingback: Camping at Golden Ears Provincial Park - Outdoor Family
Pingback: 雨天露營攻略:如何搭設防雨天幕,保持帳篷與營地乾爽 - Outdoor Family